I recently replaced my brake tail light bulbs with high-intensity LEDs. I think LEDs are a good match for automotive applications; they can be very bright, they should last essentially forever (a nice safety feature), and they place a bit less demand on the relatively weak charging system of my scooter.
Once I saw the brake lights in action, I decided I wanted to replace all my turn signal bulbs, too. But there's a wrinkle: LEDs draw so little current that the stock turn signal relay behaves as if they were burnt out - and doubles the flash rate. So I'd need a new turn signal relay.
I eventually decided that the
EFLR-1 from Custom LED would do the trick. I ordered the relay and some new LED lamps, and this evening I installed them all. Here are pictures of the process.
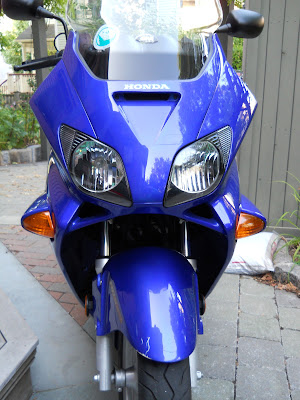
First, here's the front end of the scoot before I started.
Step 1: Remove the windshield garnish. There are 4 screws: two in the front (near the ventilation slot) and two at the bottom inside corners of the windshield.

Here's what the windshield garnish looks like off the scoot.

While I could
see the relays through the opening, there was no way I'd be able to get at it to remove it, so I continued to take off body panels. Next was the windshield.
Step 2: Remove the windshield. It's held in place by 3 screws on each side. There are supposed to be two more screws along the bottom edge; I don't have them, so I assume that when the original owner installed the Givi windshield they must have gone missing.


This makes it possible to...
Step 3: Remove the front meter visor. It's held in by four screws, two on either side and towards the back of the scoot. This opened up a nice access port.


These are on the right side of the opening (left side as you stand in front of the scoot and look at it). The biggest one is the turn signal relay.

The relay is mounted to a fin coming off a metal support tube; it's held on by a rubber carrier. I slid the carrier off the fin, giving me good access to the relay.

Step 4: Disconnect the original relay...
I could now confirm that I was, in fact, looking at the right part; Honda's OEM part is a Mitsuba FR-3303, which this clearly is. I carefully removed the relay from its connector; there is a tab on the connector that I depressed with a screwdriver blade and then gently pushed off.

Step 5: Install the new relay.
It just plugs in to the connector. At this point I tested the turn signals to be sure they were still operating.

Once I verified that it worked, I replaced the turn signal bulbs with LEDs and tested again. These are very odd looking gizmos, nothing at all like light bulbs.

Once I verified that it all worked, I put the original relay back in place (so I don't lose it) and then lay the new relay in among the other relays. I don't think it will go anywhere..

Step 6: Put all the panels back on.
I ran into two problems while putting everything back together.
- The screws that hold the windshield on screw into funky rubber widgets with threaded sleeves at the bottom. While putting the first one in (bottom left screw as I faced the front of the scoot), I managed to push the widget through the hole. It luckily dropped through all the stuff in the front of the scooter to the ground, but getting it back its hole was a royal pain. Be careful inserting those screws!
- I just couldn't seem to get the windshield garnish to sit flush with the other panels. It was getting dark, so I just closed everything up, but tomorrow I'm going to fiddle with it some more and see if I can get it on right.
Here are all the parts I've replaced and their sources. All the LEDs are from
SuperBrightLEDs.com; the signal relay is from
Custom LED.
- 2 red 7443-replacement brake lights, item # 7443-R45-T
- 2 amber 7443-replacement front turn signal lights, item # 7443-A45-T
- 2 amber 7440-replacement rear turn signal lights, item # 7440--A18-T
- 1 EFLR-1 turn signal relay replacement from Custom LED
- 1 31x10 mm "festoon light" (for the light in the under seat storage area), item # 3022-WWHP4
-- Jerry